How to Integrate Mavenlink with Time Doctor
Here we will walk you through integrating your Mavenlink account to your Time Doctor account so you can easily track time on Mavenlink tasks from within the Time Doctor desktop application.
Also, if another user has logged into Mavenlink on your current browser session, it is important that they log out completely from the Mavenlink website so that Time Doctor doesn't sync with their account by accident. It's okay if you are logged into the Mavenlink account that you do wish to integrate with.
(Regular users or managers can skip to step 7 after their administrator or company owner has enabled the company's integration in steps 1-6.)
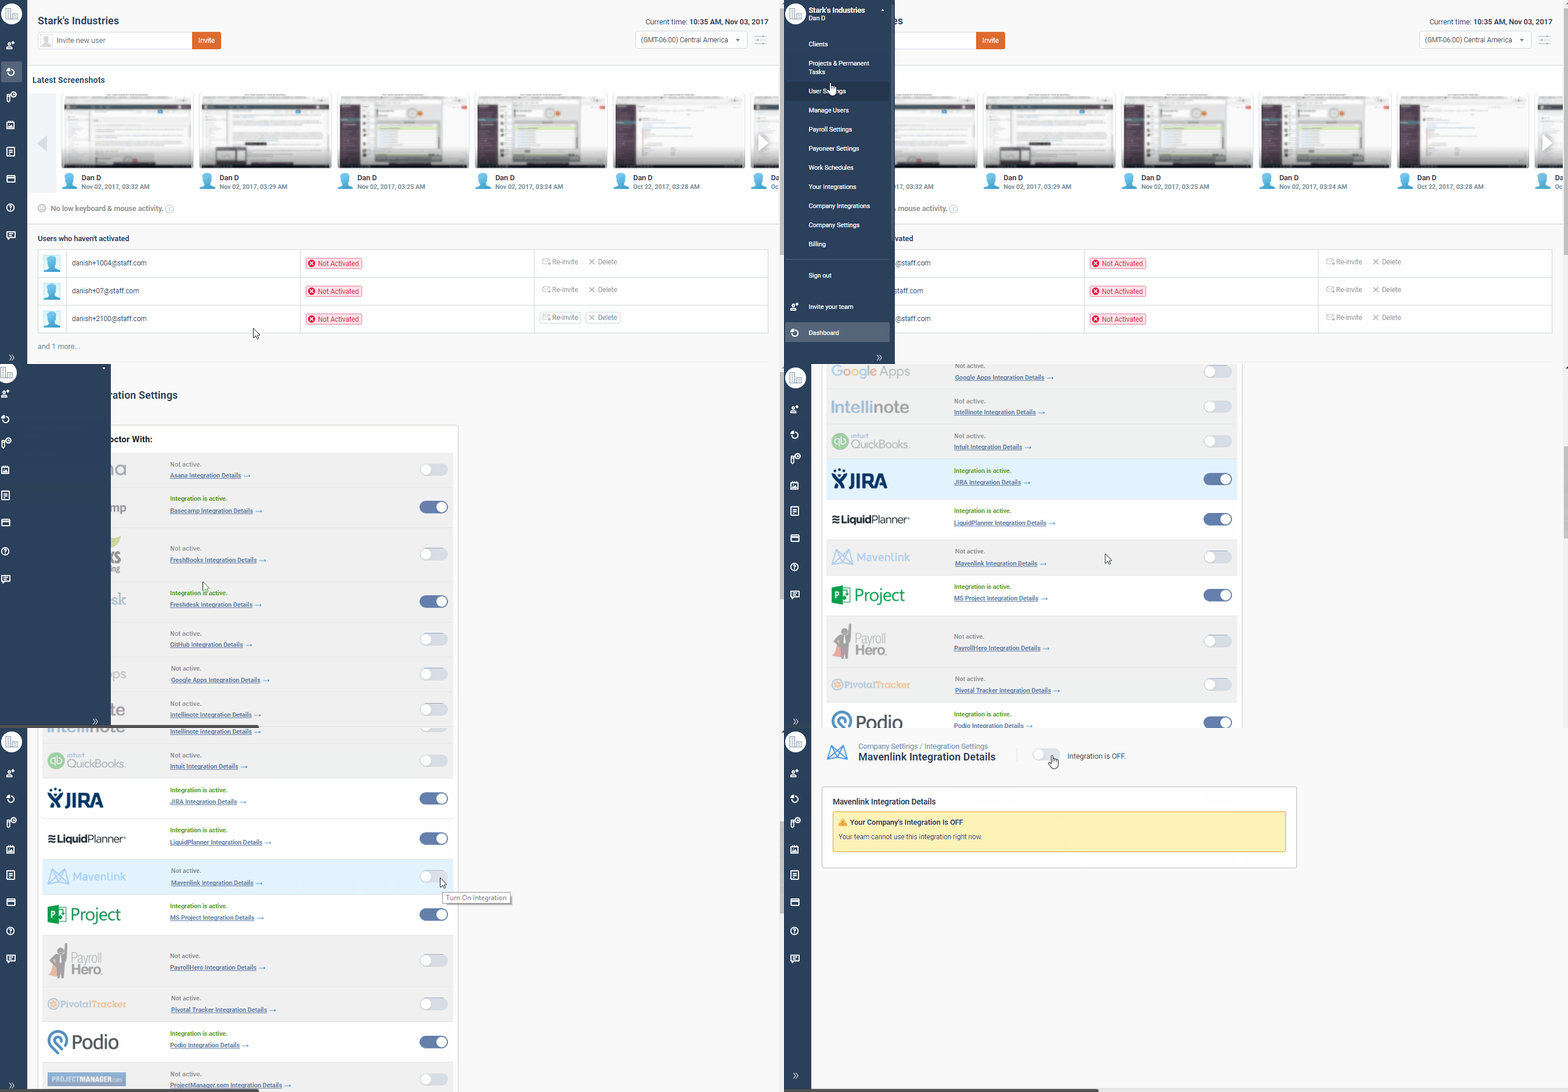
1.) For company owners or admins: Before individuals in a company can enable the integration, the company owner or admin will need to turn on the integration for the whole company on the company integrations page. The company owner or admin can get there from the main Time Doctor web dashboard by clicking on left menu bar -> click on company logo -> Company Integrations
2.) Then scroll down until you find the Mavenlink logo, and click on the ON/OFF switch.
3.) The next screen will have a "Turn it on" link that you must click on to proceed.
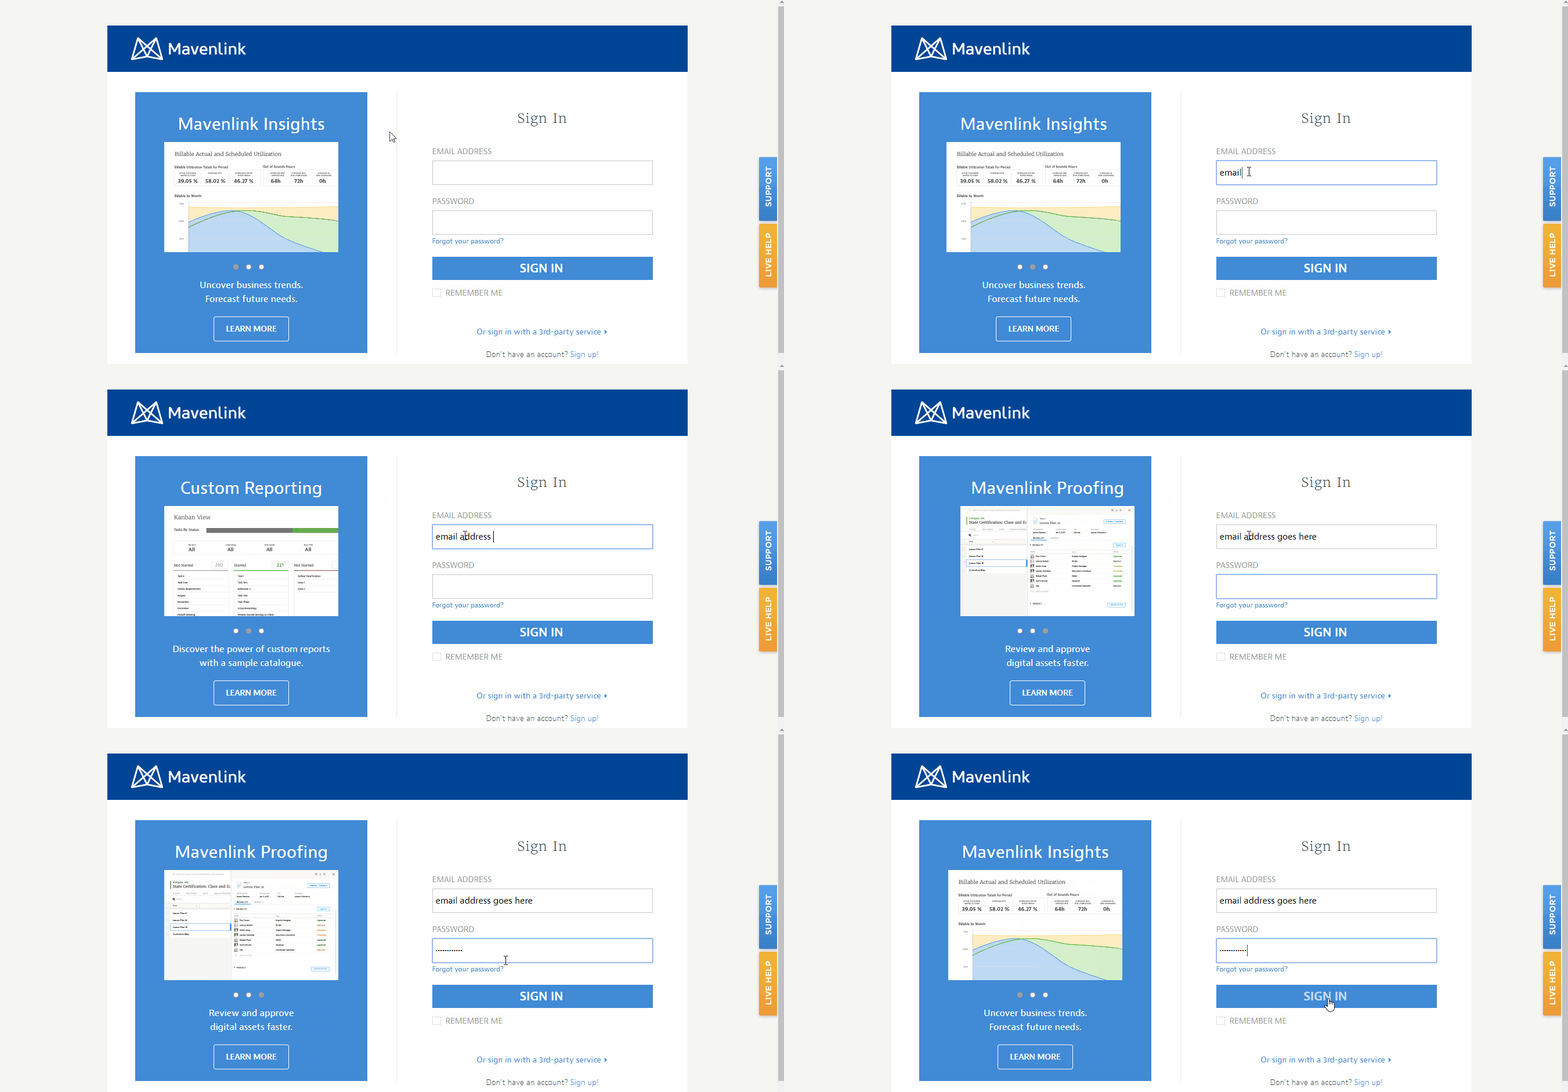
4.) If you are not logged in to your Mavenlink account, you'll be asked to sign in.
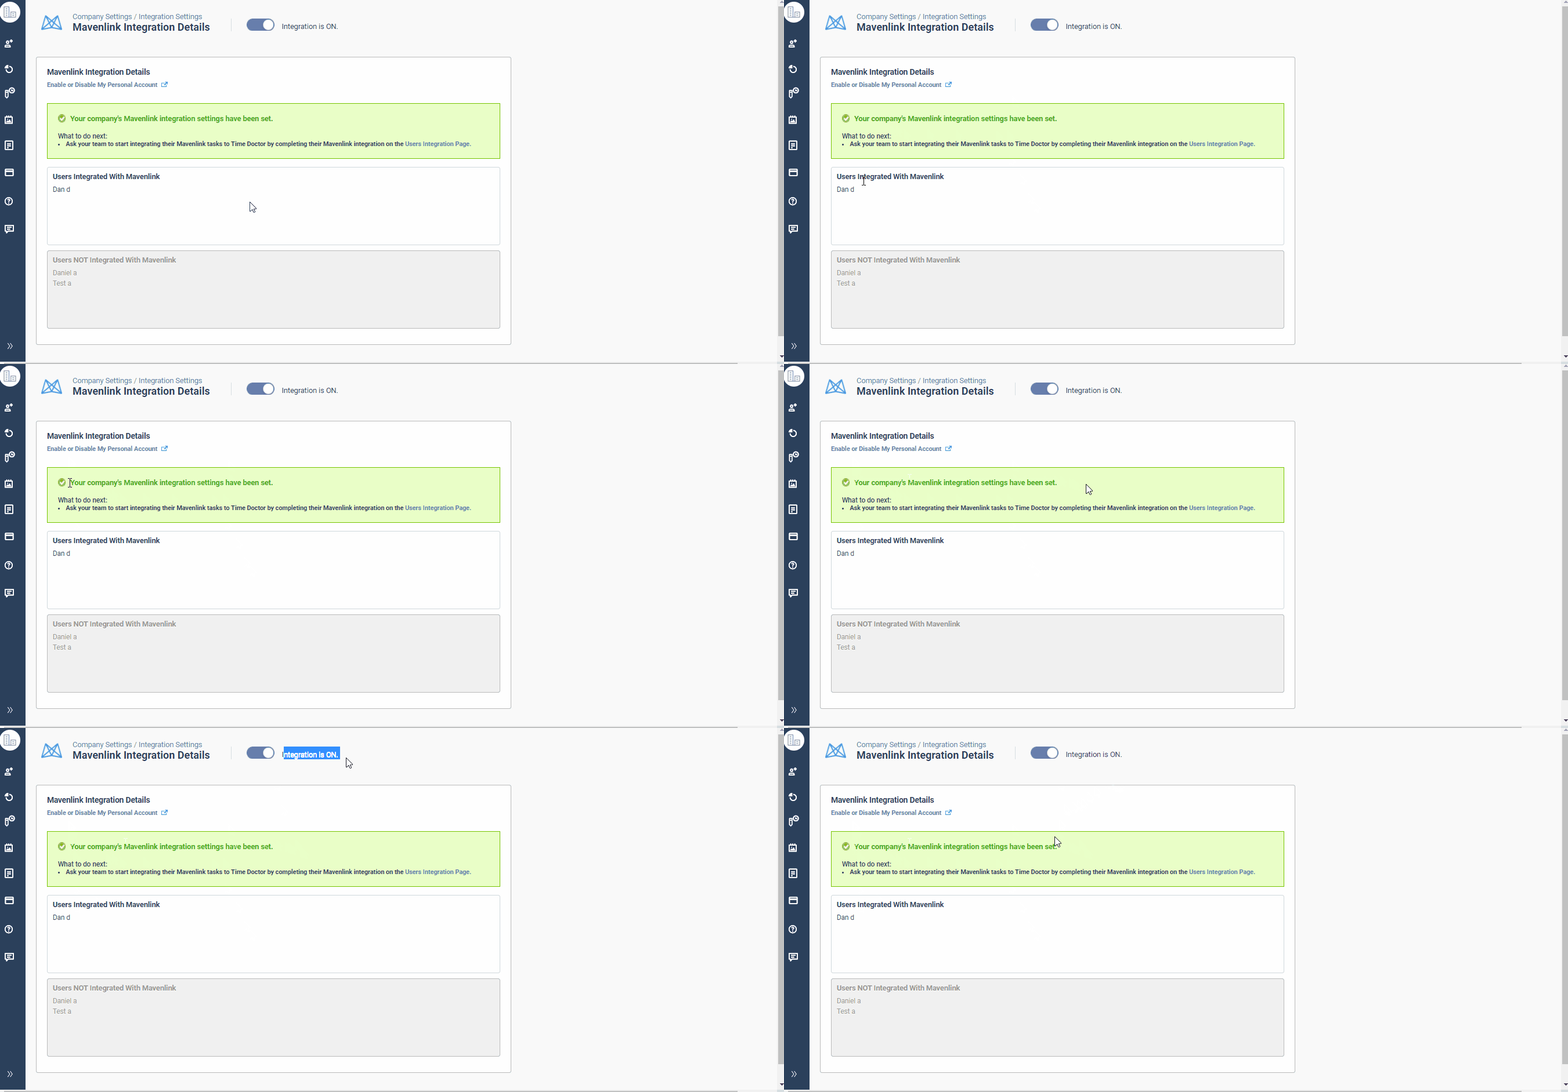
5.) After this you will be brought back to the Time Doctor integration screen to see the confirmation of integration:
6.) You will want to tell your other team members they can now integrate by following the steps below. For more details on how to see tasks inside the desktop application, see this support article. In order for tasks from Mavenlink to sync properly, ensure that the are assigned to the correct user inside Mavenlink.
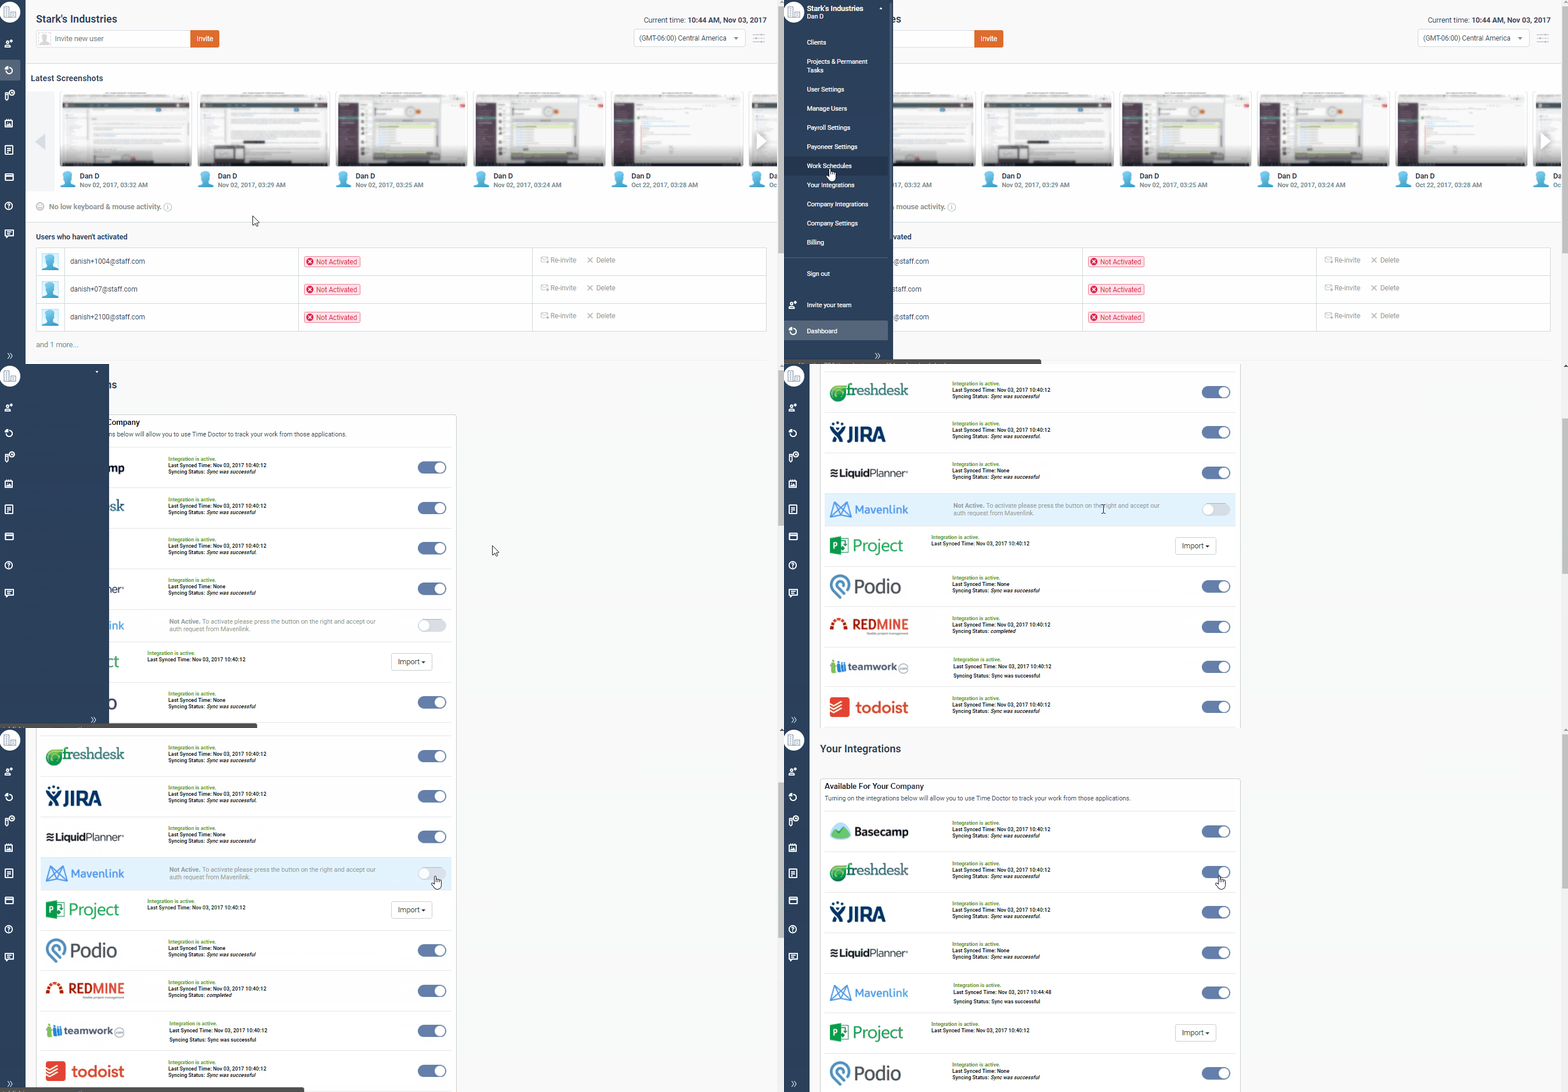
7.) For users or managers: After the company has authorized the integration, each individual in the company who wishes to use the Mavenlink integration will then need to navigate to their own personal integration page from the main web dashboard by clicking on left menu bar -> click on company logo -> Integration Settings , finding the Mavenlink selection, and turning it to "On"
8.) As with step #4 above, you will be asked to log in if you are not logged in already. The same authorization screen will appear as seen in step #4. After this you should be taken back to this success screen:
9.) Make sure you review these quick tips on how to ensure the tasks from Mavenlink will appear in your Time Doctor desktop application. In order for tasks from Mavenlink to sync properly, ensure that the are assigned to the correct user inside Mavenlink.


