Viewing and Deleting Screenshots in Time Doctor
This article will teach you how to view and delete Screenshots. Following are a few relevant points relating to this topic:
- The Screenshot Interval
Screenshots are taken at a specific time interval which a company administrator can set on the Company Settings page. If the interval is set at three minutes, for example, each screenshot will not be taken at exactly that interval, but the average interval across all screenshots will be three minutes, or whatever interval the administrator has set. - When Screenshots Are Turned Off
If you do not see Screenshots in your menu, this is because screenshots have not been turned on for your account and therefore no screenshots are being taken of your computer. Contact your company's administrator as they have control over this setting. - Deleting a Screenshot
Deleting a screenshot causes the associated work time to be removed. For example, if there were three minutes of work tracked since the previous screenshot, then deleting the current screenshot will cause those three minutes of work time to be removed. - Multiple Monitors
At every screenshot interval, a screenshot is taken of all monitors attached to the computer. Deleting the screenshot from one monitor will automatically delete the screenshots that were taken at the same time on any other monitors attached to the computer. - For Security Purposes
Our support staff is unable to access any screenshots taken through the Time Doctor software.
How to View Screenshots
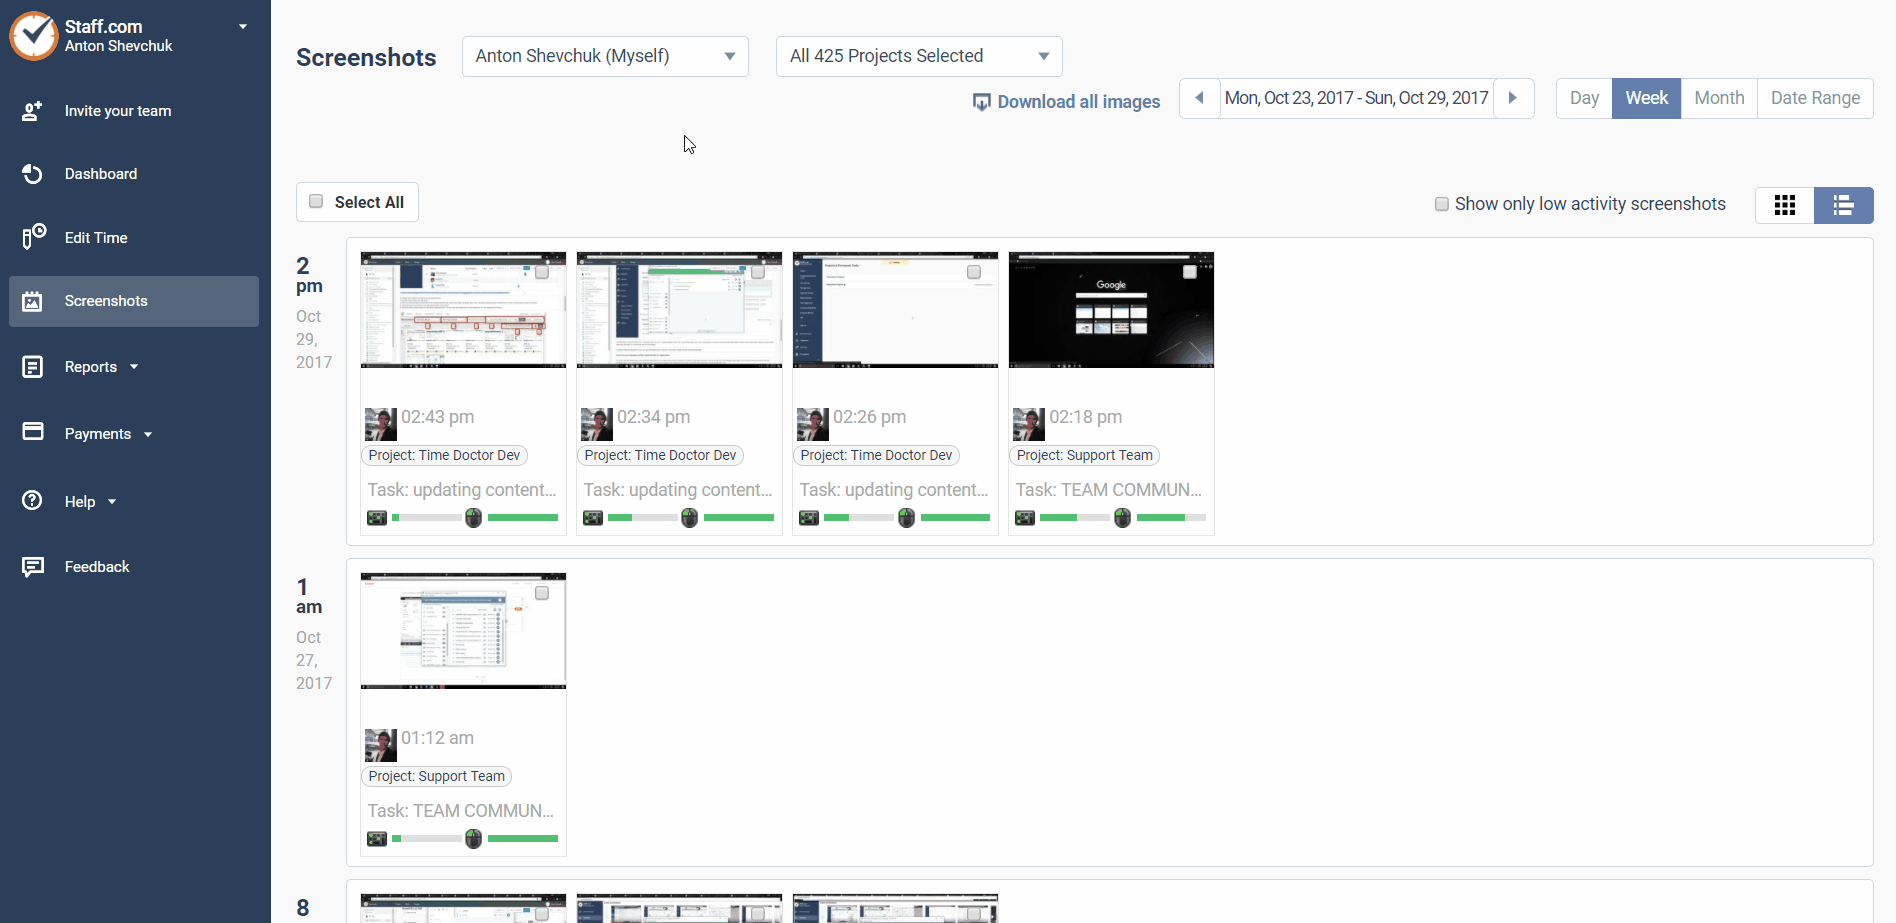
To see your existing screenshots, from the Time Doctor web dashboard, click Screenshots.

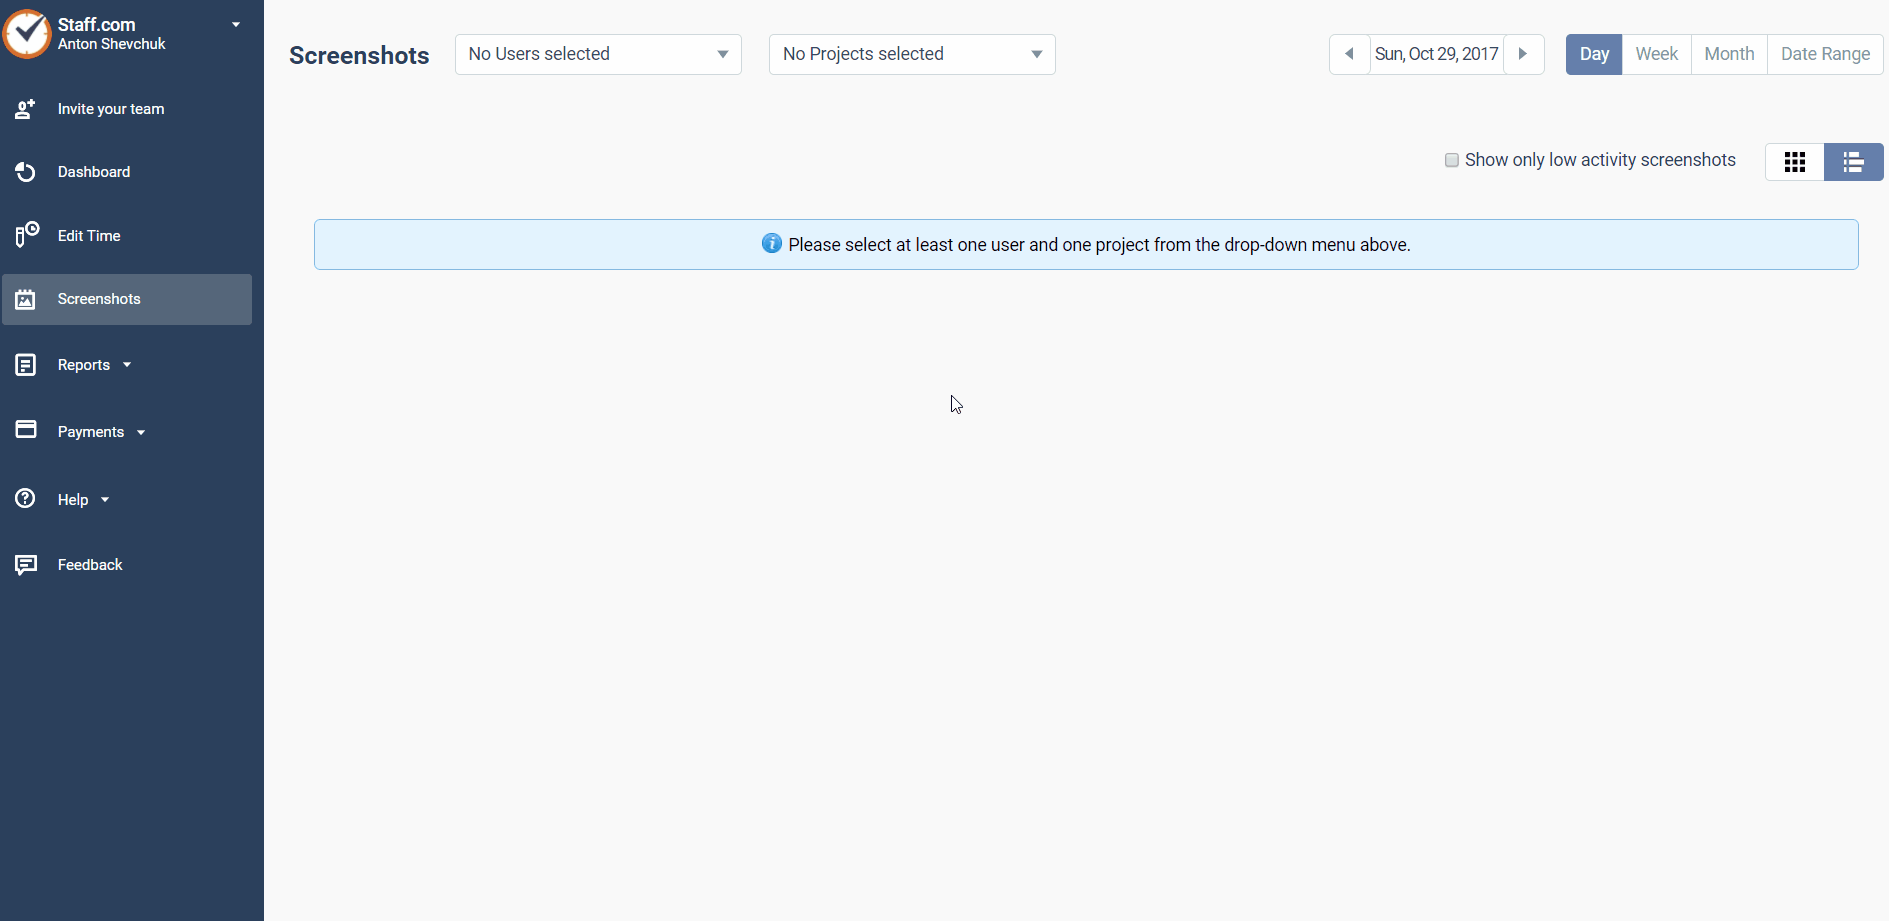
1. On the Screenshots page, select which user’s screenshots you want to view by clicking on the dropdown field.
NOTE: You may only view one user's screenshots at a time.
2. Choose which project(s) you would like to view the screenshots from.
3. Pick the duration and/or date range.
4. Now you will be able to download all screenshots for the currently selected user, project, date range, and activity level.
NOTE: Individually selecting certain screenshots will not let you download only those screenshots.
5. (Optional) You can filter out screenshots with high keyboard and mouse activity.
6. (Optional) You can select a layout option for viewing the screenshots. You may view them broken down into hourly segments or in an unsegmented list format.
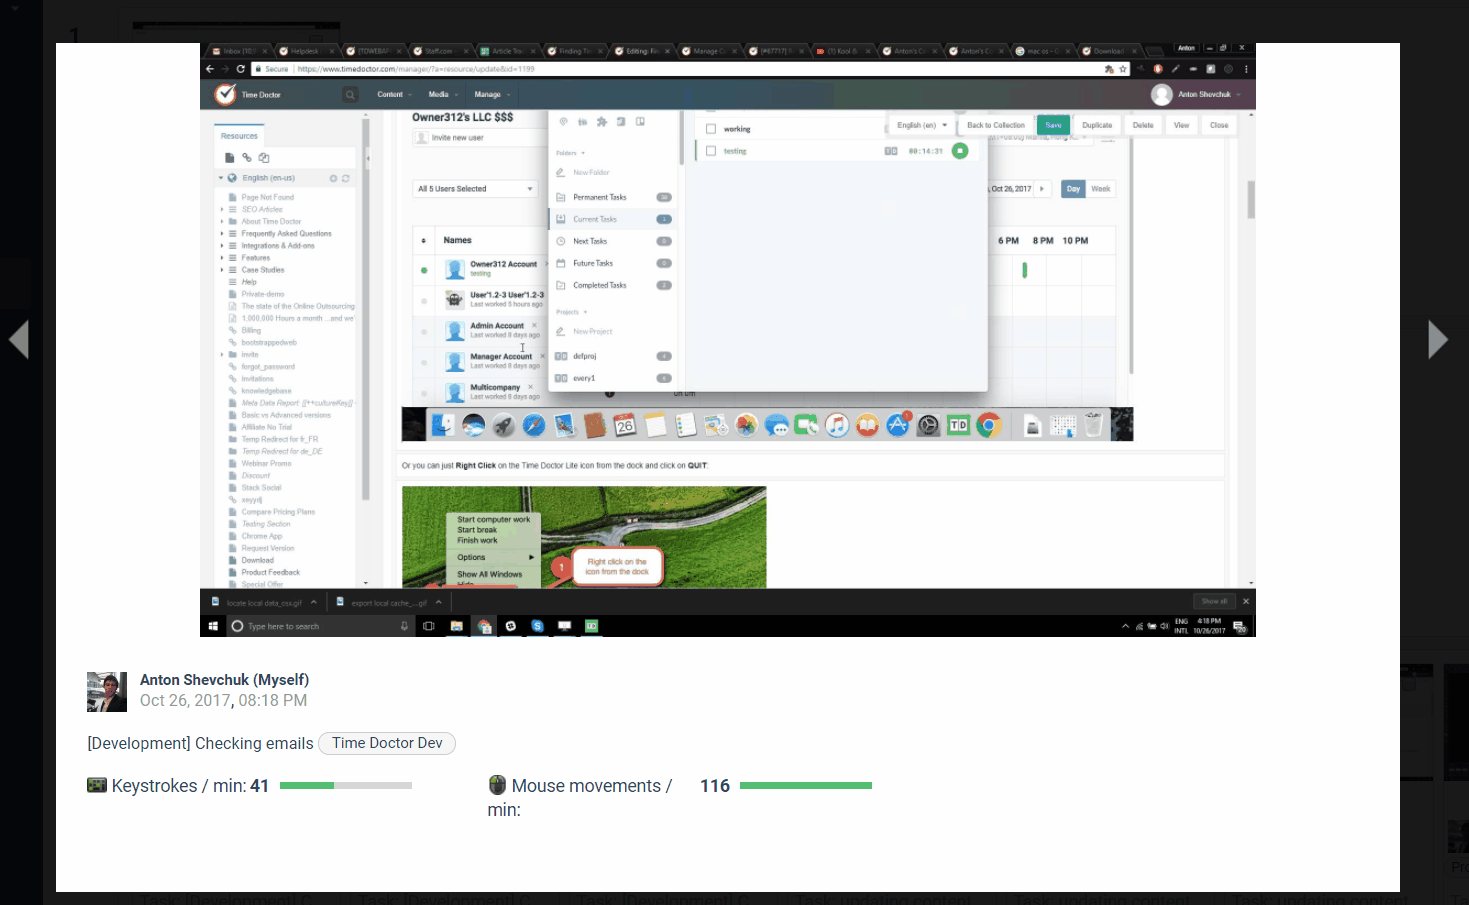
Clicking on an individual screenshot will bring up an expanded preview of the selected screenshot. From this preview you can:
1. Expand the image to a full browser window view by clicking in the upper right-hand corner.
2. Navigate to the previous or following screenshot.
3. Delete the screenshot being viewed.
4. View the keystrokes and mouse movement associated with each screenshot.

How to Delete Screenshots
From the main Screenshots page, you have the ability to select either an individual or all screenshots to view or delete. Please be aware that when a screenshot is deleted, the associated work time is permanently removed from that user's timeline. If you would like to add time to fill the gap created by a deleted screenshot, the user may do so from their Edit Time page.
NOTE: Your company’s owner or administrator has the ability to allow or disallow the deletion of screenshots. Please contact them if the Delete button does not appear when selecting screenshots and you would like to remove one or more screenshots.
From the screenshot below:
Click Select All or individually select each individual screenshots on the current page (NOT all of the screenshots in the current date range). After you have selected one or more screenshots, a Delete button will appear at the top of the page. Once you click it, a popup will appear to confirm that you wish to permanently delete the screenshot(s) with no option for recovery.